
Okay. The majority of the evening was spent not only constructing this section (RGVAC) of the rtype.com website, in particular - the Prologue.
Lots of admiring of the defender, but another day tinkering with a PCB. BAM! After a couple of hours a Star Force is resurrected!
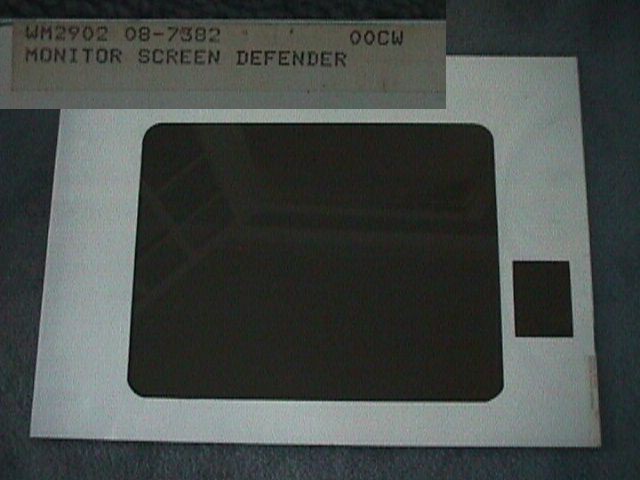
Having said that, I took the opportunity on the way home to stop at Swallow and pick up the NOS Monitor Bezels Steve had. they are so sweet, I've actually grabbed a picture for you, so you can see what a Williams NOS Screen looks like, complete with plastic overwrap - sweet. Along with the NOS marquee deal, and the Fabulous Fantasy Overlay, I'm nearly sorted.
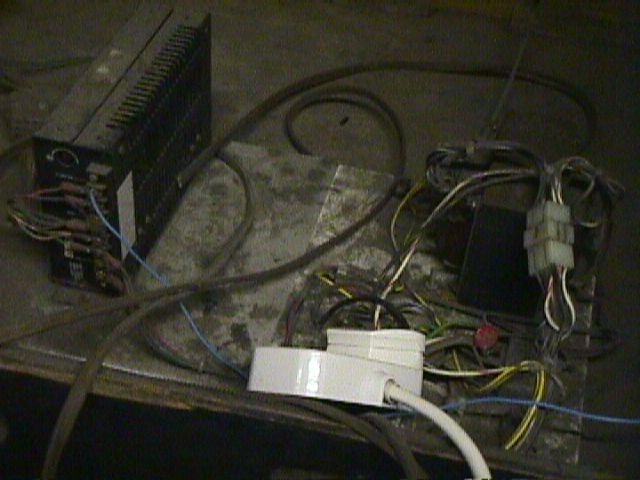
I also took the opportunity to pick up a brand new switching power supply for when I get there. Steve's a star! He's got an original Defedner instruction inlet which he's going to colour photocopy twice for me. Thanks Pal! he also gave me tips and button drilling and a sample old button for good luck. What a star!.
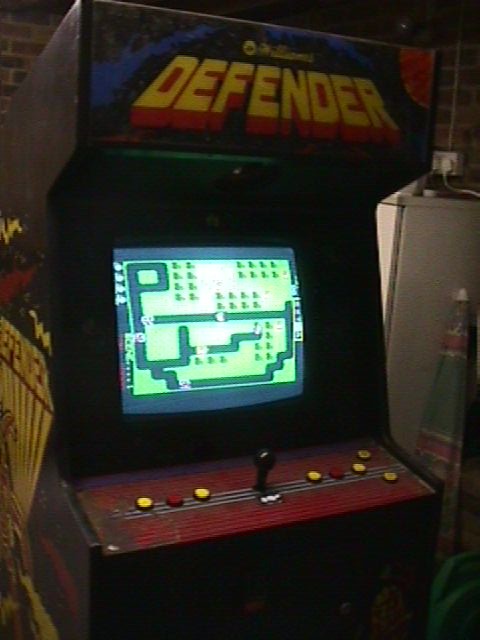
Time to get into the Defender cab big way. I was in two minds - give it a wash and a Hoover inside - OR test out the monitor, wiring, whatever.
 |
Well, I figured it would be better to pull the power out and then Hoover, so better check the monitor and wiring as is now hey? The fly lead to the plug socket wasn't there - and the was an American style 3 pin socket (I recognized this from my R-Type machine). Easy, removed the 3 pin socket, and attached a male UK plug - hey another 5A fuse in the way could help I figured. A simple case of plugging the plug into an extension lead. Getting ready to throw the switch, I thought... |
Game!
No point firing up with nothing for the monitor to display. Its a JAMMA connector right? Easy, find the least valuable PCB I have - a WWF Wrestlefest (sorry WWF fans). Actually, the JAMMA socket faces upwards (did the cab originally support the PCB by weight alone - surely not? Fortunately, I'd made up a JAMMA "Extension" lead for testing with my Vertical Cabaret. That meant the PCB could be outside on the extension lead and away from a PSU fire. Wrong.
It isn't a JAMMA - its an Electrocoin 28-way socket! Doh! Okay, I have only one PCB that fits that - a Mr. Do. Was I that brave - or stupid? Well, James did tell me it should work a-OK, but then he'd said it was JAMMA. hmm. Mad I know - I said sod it, whapped it in the 28-way (the weight held it quite nicely actually, and by natural weight it leaned away from the metal coin box - neat). Flicked the switch...
...and nothing.
IDIOT! The defensive button switches that protect the coin door and back of the cabinet are hanging free - and therefore cutting out the power. Another bad habit - I get the sellotape and stick them down - it is a test after all. Retry the power switch.
 |
We have life! The
monitor came on - green with age, but hey I've got used to that, it soon
brightens with time. The joysticks and buttons work (luckily I don't
have to use the coin mech. as its leads have been snipped - good old
FREEPLAY).
So I try and play, just isn't right with the screen not vertical - but hey this is a test. As soon as I touch the button, theres a flash near my head, I duck instinctively - was that the bulb?
|
 |
Well, of course I turned
it off straight away didn't I. Got a screwdriver and took of the top
plastic that holds the marquee in place. Once free, I finally pull the
remainder of the "Multiplay" off, and have a look inside.
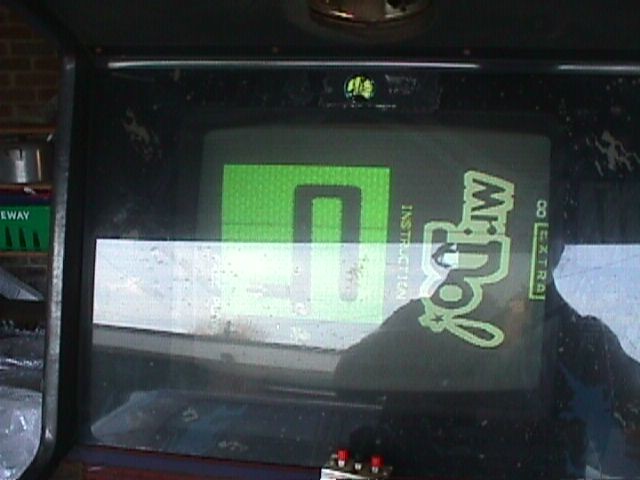
The Defender USA bulb is still in place, and I can see the speakers even worse than you could see from the outside. Back on with the power! Yep! The bulb illuminates - with a struggle. I grab the camera and go mad - I close the garage, turn off the lights, take pictures of MR Do fallen over, in the dim with Defender dimly illuminated - bloody corrupted disk means I lost loads of snaps - that one will have to live in my memory - until the projects complete that is. Later in the evening I go back to recreate this picture, but I discover the bulb is R.I.P.
|
|
|
With the marquee off, I
wire up a new speaker - of course Mr. Do is unamplified, but its enough to
hear it faintly in the background.
Time to look under the control panel. A couple of micro-switches are smashed, but most buttons work. The shot here doesn't do justice as in the daylight, you could see the coin mech, coin box and wiring in far more detail. Oh well.
|
And thats the end of the day. Time to update the site and have a Internet surf... =)
Today, I told myself at work, would be the day I cleaned the cab. Things TRIED to get in the way (like 4 PCBs arriving from a great fella Tobias), and some manual shifting of other stuff.
But no! After dinner I stare aimlessly at the machine thinking whats best to clean the sides. Sod it! Is my conclusion, lets strip it (of electrical hardware of course)!
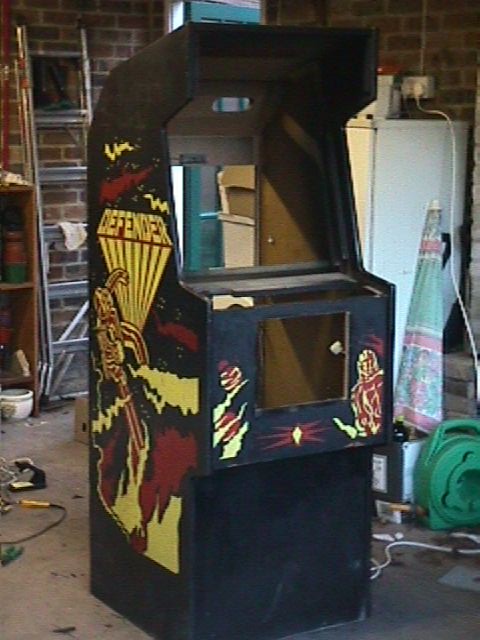 |
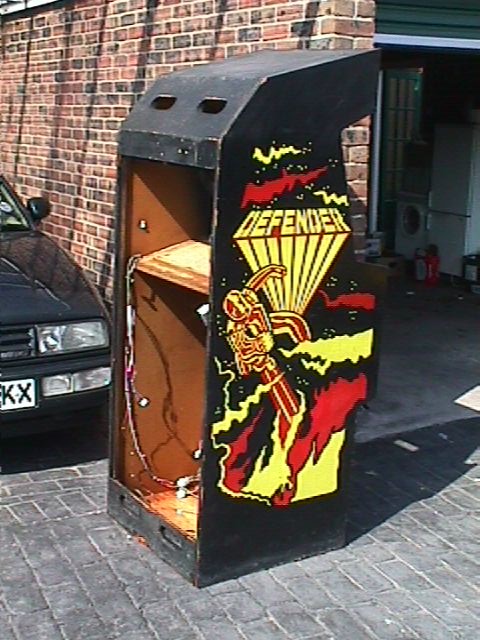
Okay, This pictures
jumping the gun a bit, but this is how I've left my machine tonight -
bare and empty =(
There was, of course, a danger of admiring for far too long, and not actually *doing* anything. Well. its wasn't all plain sailing - one of the damned screws that bolt the monitor to the shelf was cross-treaded and took and HOUR to get removed. That wasn't the only bugger - the coin box still had a padlock on - fortunately I could squeeze the box out, leaving the lid (revealing two plastic trays). Quick removal and I'll take the bracket to work and get a guy to cut it off for me =) But before I got to that point, I'd started with the speaker panel - someone tell me a source for the speaker grill plastic hey? |
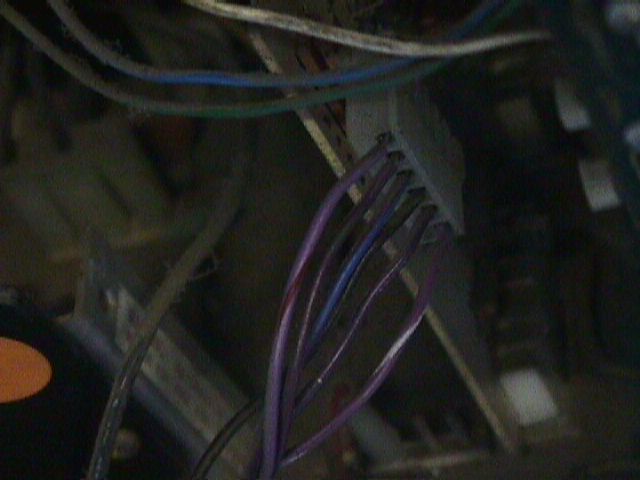 |
Before I go too far and
fully removed the monitor, I took a quick snap of the connector, as the
colour scheme was my only clue. Or was it? Because the screw took too
long I finally decided to Hoover out the machine as the dust was giving
me grief - lo and behold, on the back of the monitor is a wiring
diagram!.
Hoovering was a good idea - I found a 20 pence piece for a start [that will be the first one put through the slot when its finished...], and revealed a sticker with the defender monitor connectors and adjustment knobs - I'll digi-snap that tomorrow.
|
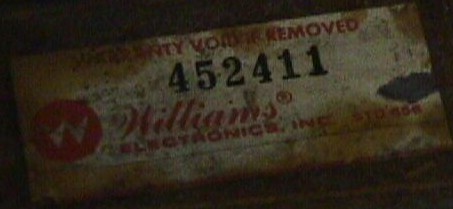 |
This is a snap of the monitor serial number, again revealed under all the dust! |
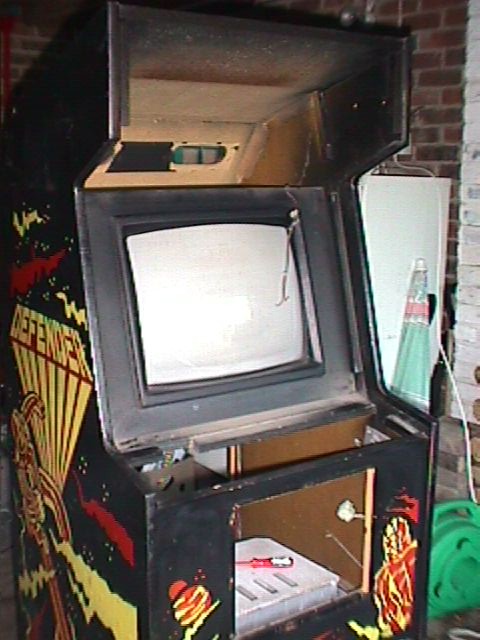 |
So, back to the front
after the monitor was out and on the shelf. This was the last picture I
took of it still in - if you click for the enlargement you might still
be able to make the screen-burn that the Plexiglas covered up - shall I
stump up for a new monitor - what size, shape or form should I go for if
I do...
The under-monitor bezel is in good shape and I might keep it - I couldn't see it with the Plexiglas on - perhaps some "back-to-black" - the car bumper stuff... Readers - let me know whats best... The control panel was 'Molex' connected on, and was a simple disconnect - NOW I understand comments on the newsgroups about how easy a Williams defender Control Panel is to change! |
One other thing I discovered whilst stripping - James' (the seller) house was full of cats - all the neighborhood cats had come round to lay-claim to my cab - a wet patch by the power supply - wish they'd been fried. Actually, the whole thing does smell of cats, but that could be scent. Fortunately I've got anti-cat spray.
Well, the cab now only has the gut wiring - fortunately Molex to Molex - those guys knew they'd need easy-change features... Tomorrow is definite cab-cleaning day, ready for filling and black matching all weekend... Off for a beer now (the dust has well clogged me up)... choi
Got home to late from work to do anything physical with the cab. That didn't stop me doing something - another great pal of mine, Skitz, spent hours teaching me the fundamentals of electricity, cab wiring, etc. I learnt masses - it showed me I don't know enough to be truly proficient at this.
Although I'm still trying to get my head around it, there's a great article at a great site, www.randyfromm.com on Isolation transformers, and monitor powers that frankly is a MUST to comprehend. So although nothing major league happened - I now feel far more confident with the rewiring and replacement of the power supply in the Defender cab.
 |
Fridays are always great for me - I finish at 12:30! This gave me a great opportunity to wash out the cab in the brilliant sunshine - not before stopping at Maplins to buy a crucial RGVAC item - a multimeter. I started with a soapy bucket and sponge, but soon realized that this was far more grimier than I expected - so what the heck... I hosed her down - inside and out! Actually, with all the electrical equipment out of the way it was surprisingly easy to handle the cab, and it soon began to sparkle. Having been lucky with an absurdly warm day for April, it took no time to dry, although I let it sunbathe right up to dusk.
|
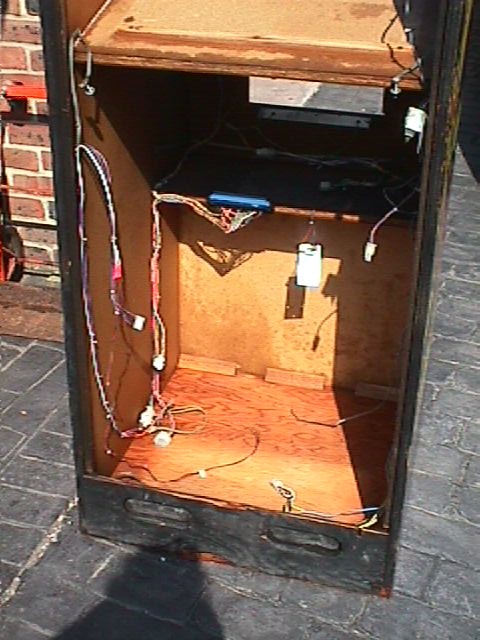 |
And this is what the
insides look like after a good scrub down.
Wait! I hear you cry! You've washed it with wiring still in. Well, yes, fortunately the whole wiring has Molex plugs at both ends. I've actually left them in for reference when I come to re-wire the thing - actually might not bother with the harness - it looks fine. Took no time to dry and I can also see the wiring colours now! |
 |
You remember I said in
the prologue that there was green paint on the side? Well, with the help
of a well-worn green washing up scrubber and the hot soapy water
it all came off! Word of warning though - there was also a label stuck
on the right side which I used the scourer on - this has subsequently
left scratch marks - the yellow and red paint is too bright for you to
notice the scratches.
Still... having scrubbed and hosed I was a little concerned when the water turned red slightly from the scouring, and I dried the cab with a tea towel. |
 |
Well - I still had time
in the afternoon - it was baking, the cab was in the drive (needing me
to admire it constantly).. What could I do?
I know! Strip the control panel. This gave my my first insight into how the micro-switches are held in place, how to get a button off, how to dismantle the joystick, etc. Most exciting. As you can see, I've kept the buttons attached to the CP wiring just in case I ever need it - some of these buttons are quite cool and have light housings built in - they'd make good start buttons on some of my generics... |
Part of the reasons for the multimeter was that my vertical generic cab had gone dead on me, and I spent the morning determining that the PSU was dead. Seeing the defender one was not going back, I unwired it and installed it in the vert. It worked, but the JAMMA connector was also bust - so I took the opportunity to totally redo it - now looks better than it did, and a lot more tidier.
But this isn't a RGVACing diary - yet - its a Defender restoration diatribe. Well, late afternoon I took a trip to the hardware stores and came back with a load of goodies for the project. I bought some filler called P38 under recommendations for Skitz for a car repair place, and set about filling in the holes on the Control panel.
Well, I reckon I did a great job! I used parcel tape (nice and wide) to place a cover over the holes on the top surface of the panel. Then, working from the underside I filled the holes with the P38, making sure of no air bubbles and that I wasn't too excessive.
Now this is where I think I made a MAJOR tip for you all. I placed the board with the parcel tape DOWN onto the top of the tabletop in the garage. This was totally flat of course and once the P38 set (only 10 minutes) I peeled of the tape, turned the board over and let the other side set - totally smooth and only needing Minor sanding tomorrow. looks absolutely fabulous.
Proud as punch, I then wasted the rest of the evening using another epoxy filler to fill in the holes on Mr Ugly's control panel - which I'm converting to JAMMA+. This was a metal panel, but I used the same technique - although the hole drilling will me more fun.
| BACK |
